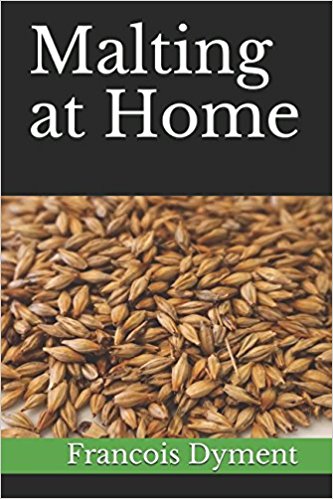
This year I planted 240 sq. feet of Chevalier barley and came up with 23 lbs. in total. I could probably make 10 gallons of beer out of that which would amount to roughly 120 standard-size (355ml) bottles. So 1 bottle per 2 square feet, not bad, could have been better though as I did get some lodging.
May 15, 4 weeks after planting and it’s coming up nicely
May 23May 29 June 12June 27 It couldn’t have looked any better and then….July 6 After just one night of rain. These posts are my lame attempt at propping it up again just to get things away from the ground and the mice. Normally to prevent this from happening I use chicken wire suspended with posts about 2 feet off the ground, the barley grows through the holes of the chicken wire and is supported enough to not fall over when it rains, but this year I was either lazy or extremely optimistic. When the barley falls over it’s susceptible to mold and mice since it’s close to the ground. The kernals also stop growing and end up being quite small.Some mice damage.
July 24 Almost harvest time. The green that you can see is weeds. The owl is standing guard, keeping the critters away.
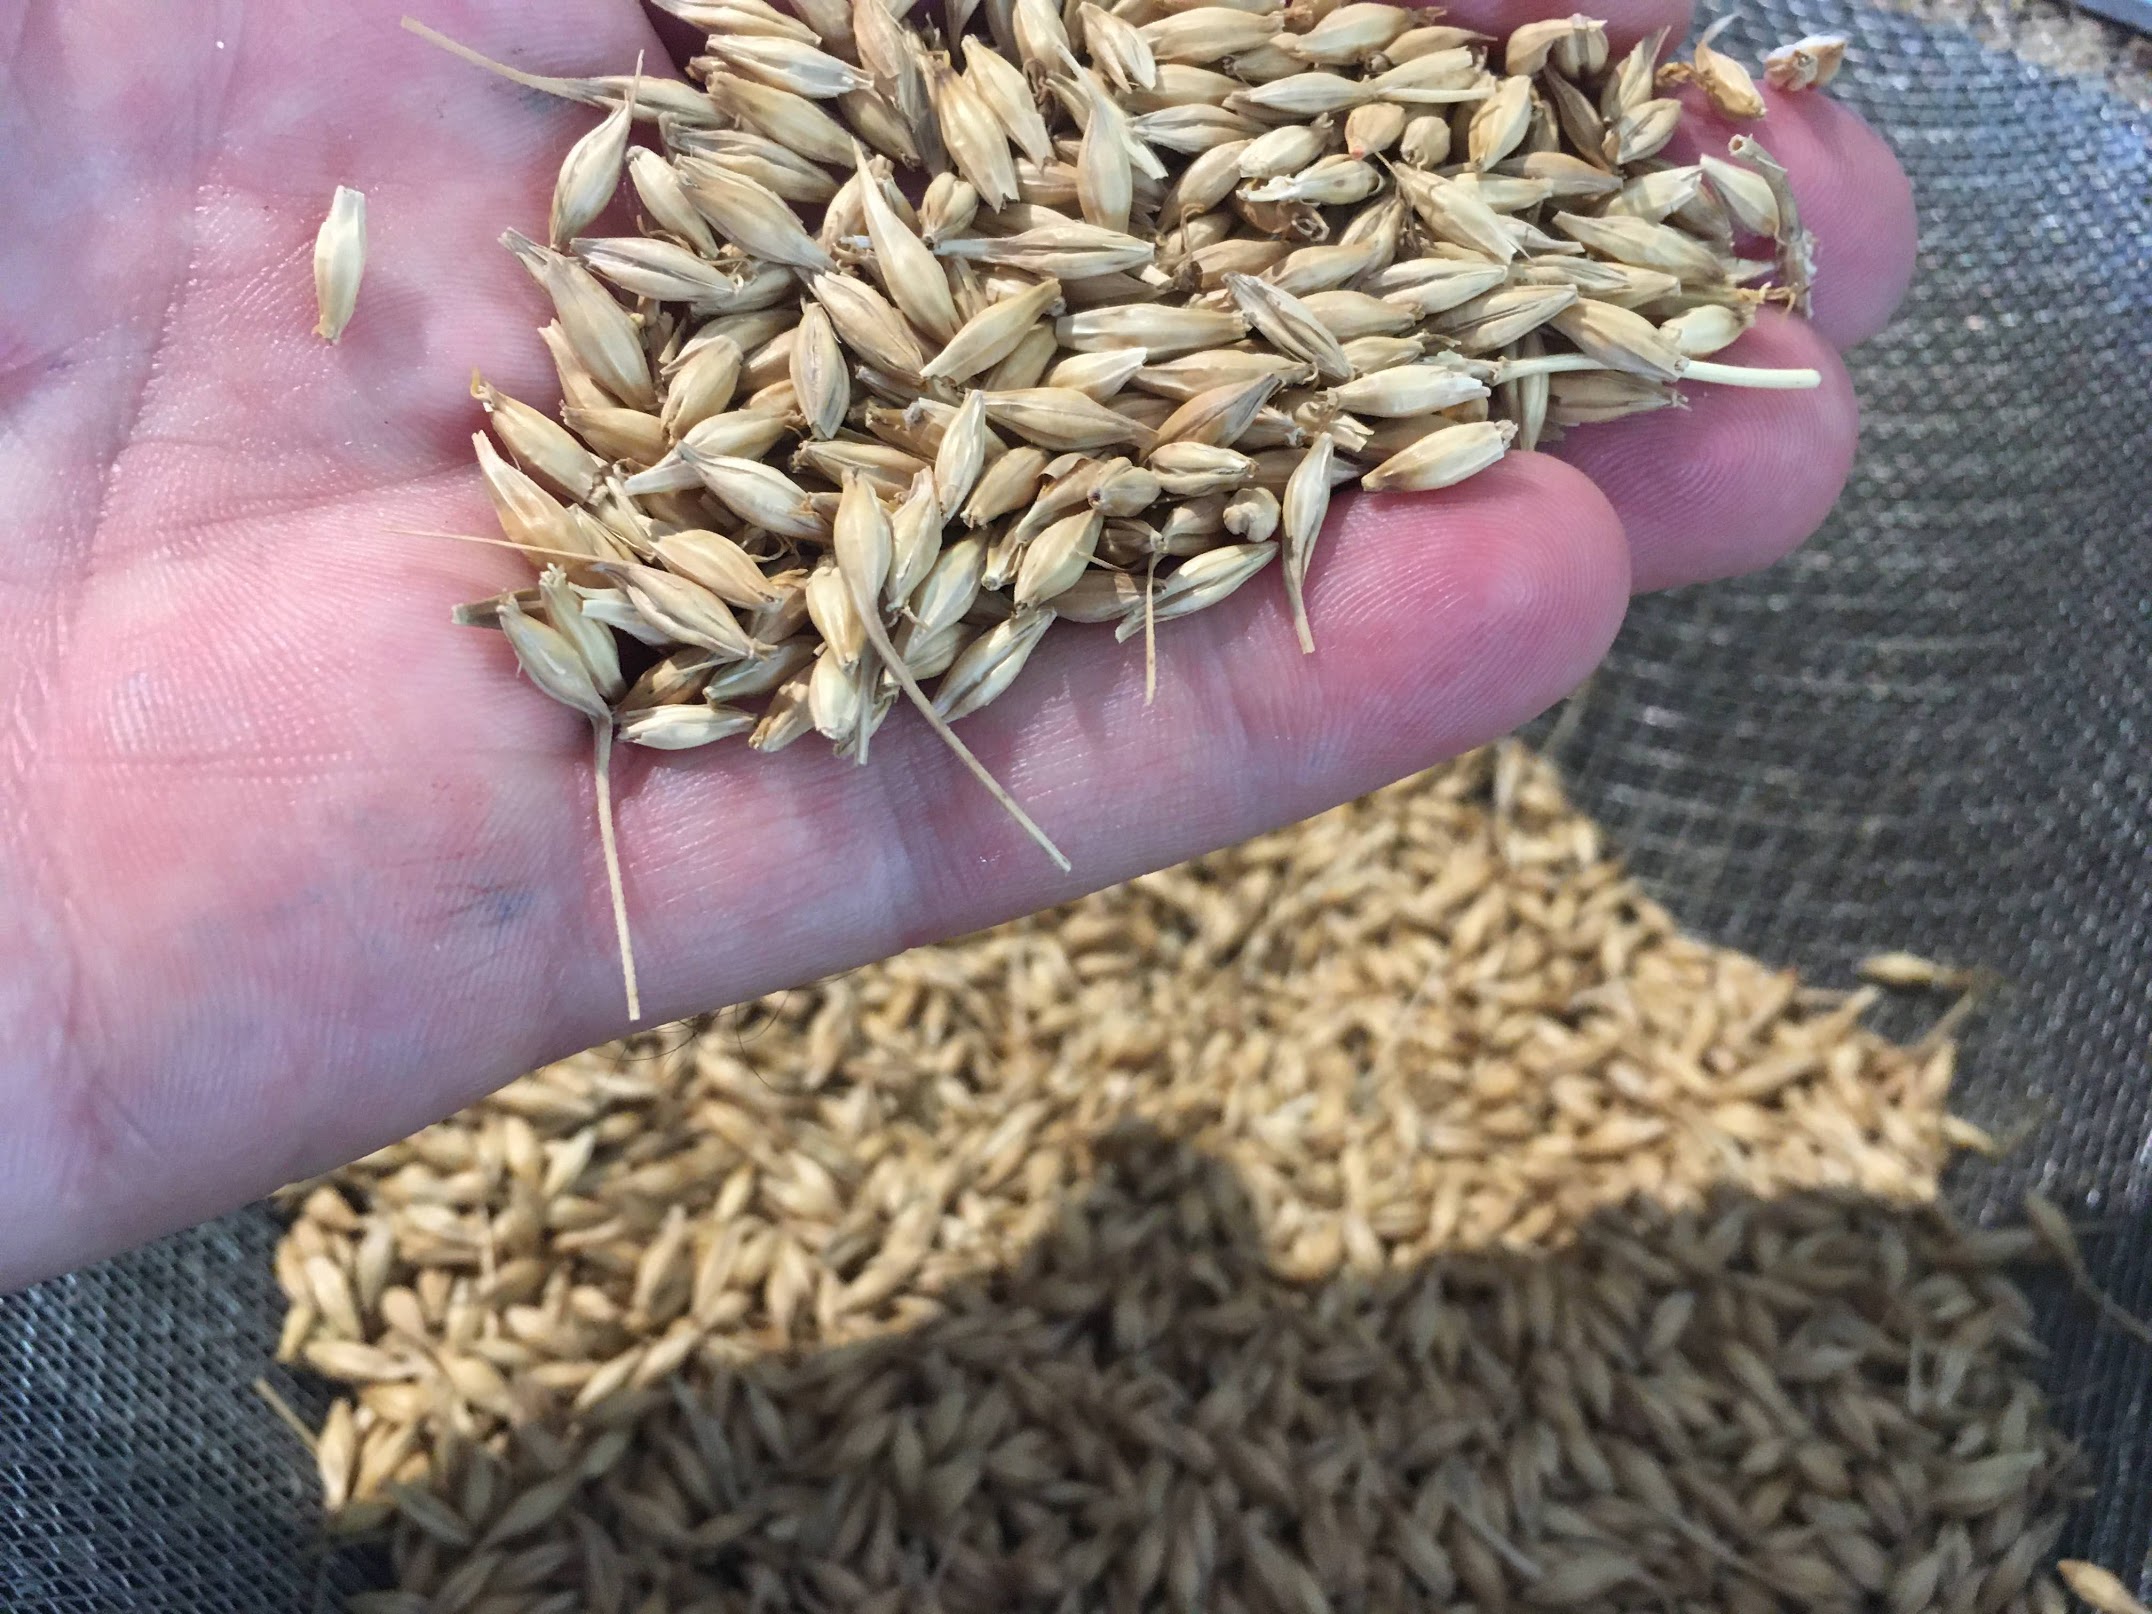
Harvesting took a few days over the course of a couple of weeks. I just hand-pick the heads so that I can leave the areas that are not fully ripe. This year I tried a new way of threshing which is going to make my life so much easier. I just stomped on it while it was in the Rubbermaid bins. I waited a few weeks after harvesting to make sure the kernels were hard. This method works surprisingly well, about 10 minutes of stomping and shuffling around in the bin and it’s done, no more noisy drill!
It’s been a long time since I’ve posted anything, I’m still alive, I’ve just been incredibly busy. I’m hoping to get back into malting experiments as there’s just a ton of things on my to do list. Last year I was going to do some experiments growing and malting Amaranth. That’s all I grew, no barley, so I had all my eggs in one basket and that was a mistake. The Amaranth grew beautifully and it was huge but due to my neglect in the final drying process it all went moldy, I had to chuck all of it! What a huge disappointment. Since the plants were so pretty I decided to show you the pictures anyway, perhaps if you grow amaranth you can avoid the mistake that I made.
Started the seeds in Peat packsThe seedlings grew really fastBy the end of the summer they were 8 ft tall!The seed heads seemed to open up when they were ripe and the seeds started to fall out.The seeds are tinyI’ve since read that the best way to harvest the seeds is to shake the seed heads or thresh them as soon as you pick them. I tried to dry them out in the sun for a few days, then we had some bad weather. This was just one batch there was a lot more.I put the seed heads in paper bags in our garage thinking they were dry, but they were not and after a few days grew moldy. The reason I didn’t hang them is because I didn’t want the seeds falling out all over my garage, but I probably could have put a tarp down or something to catch them.
So Amaranth beer will have to wait until I buy some or grow some again. Now back to barley!
Here it is, my first Bygg or Bere beer, either one has a nice ring to it. Yields were very low last summer as everything got swallowed up by weeds but I did manage to come out with about 8 lbs. of Bere. I decided to make a 2.5 gallon batch with 6 lbs malted, 8 oz roasted and then save the rest for planting this year.
Malting- Initial moisture content was 12% I did an unaerated steep in keeping with a more historical malt. I changed the water twice (once every 24 hours) during the 56 hours it steeped. Final moisture content was 48.5 %, a little high so I probably could have taken it out at the 48 hour mark. Ambient temperatures were between 12 and 14C. Germination lasted 10 days. Air-on temperatures for kilning were 25C for 17 hours with a fan, 11 hours at 50-60C without a fan and 3 hours at 185F for a total of 5lbs 3 oz. of malt.
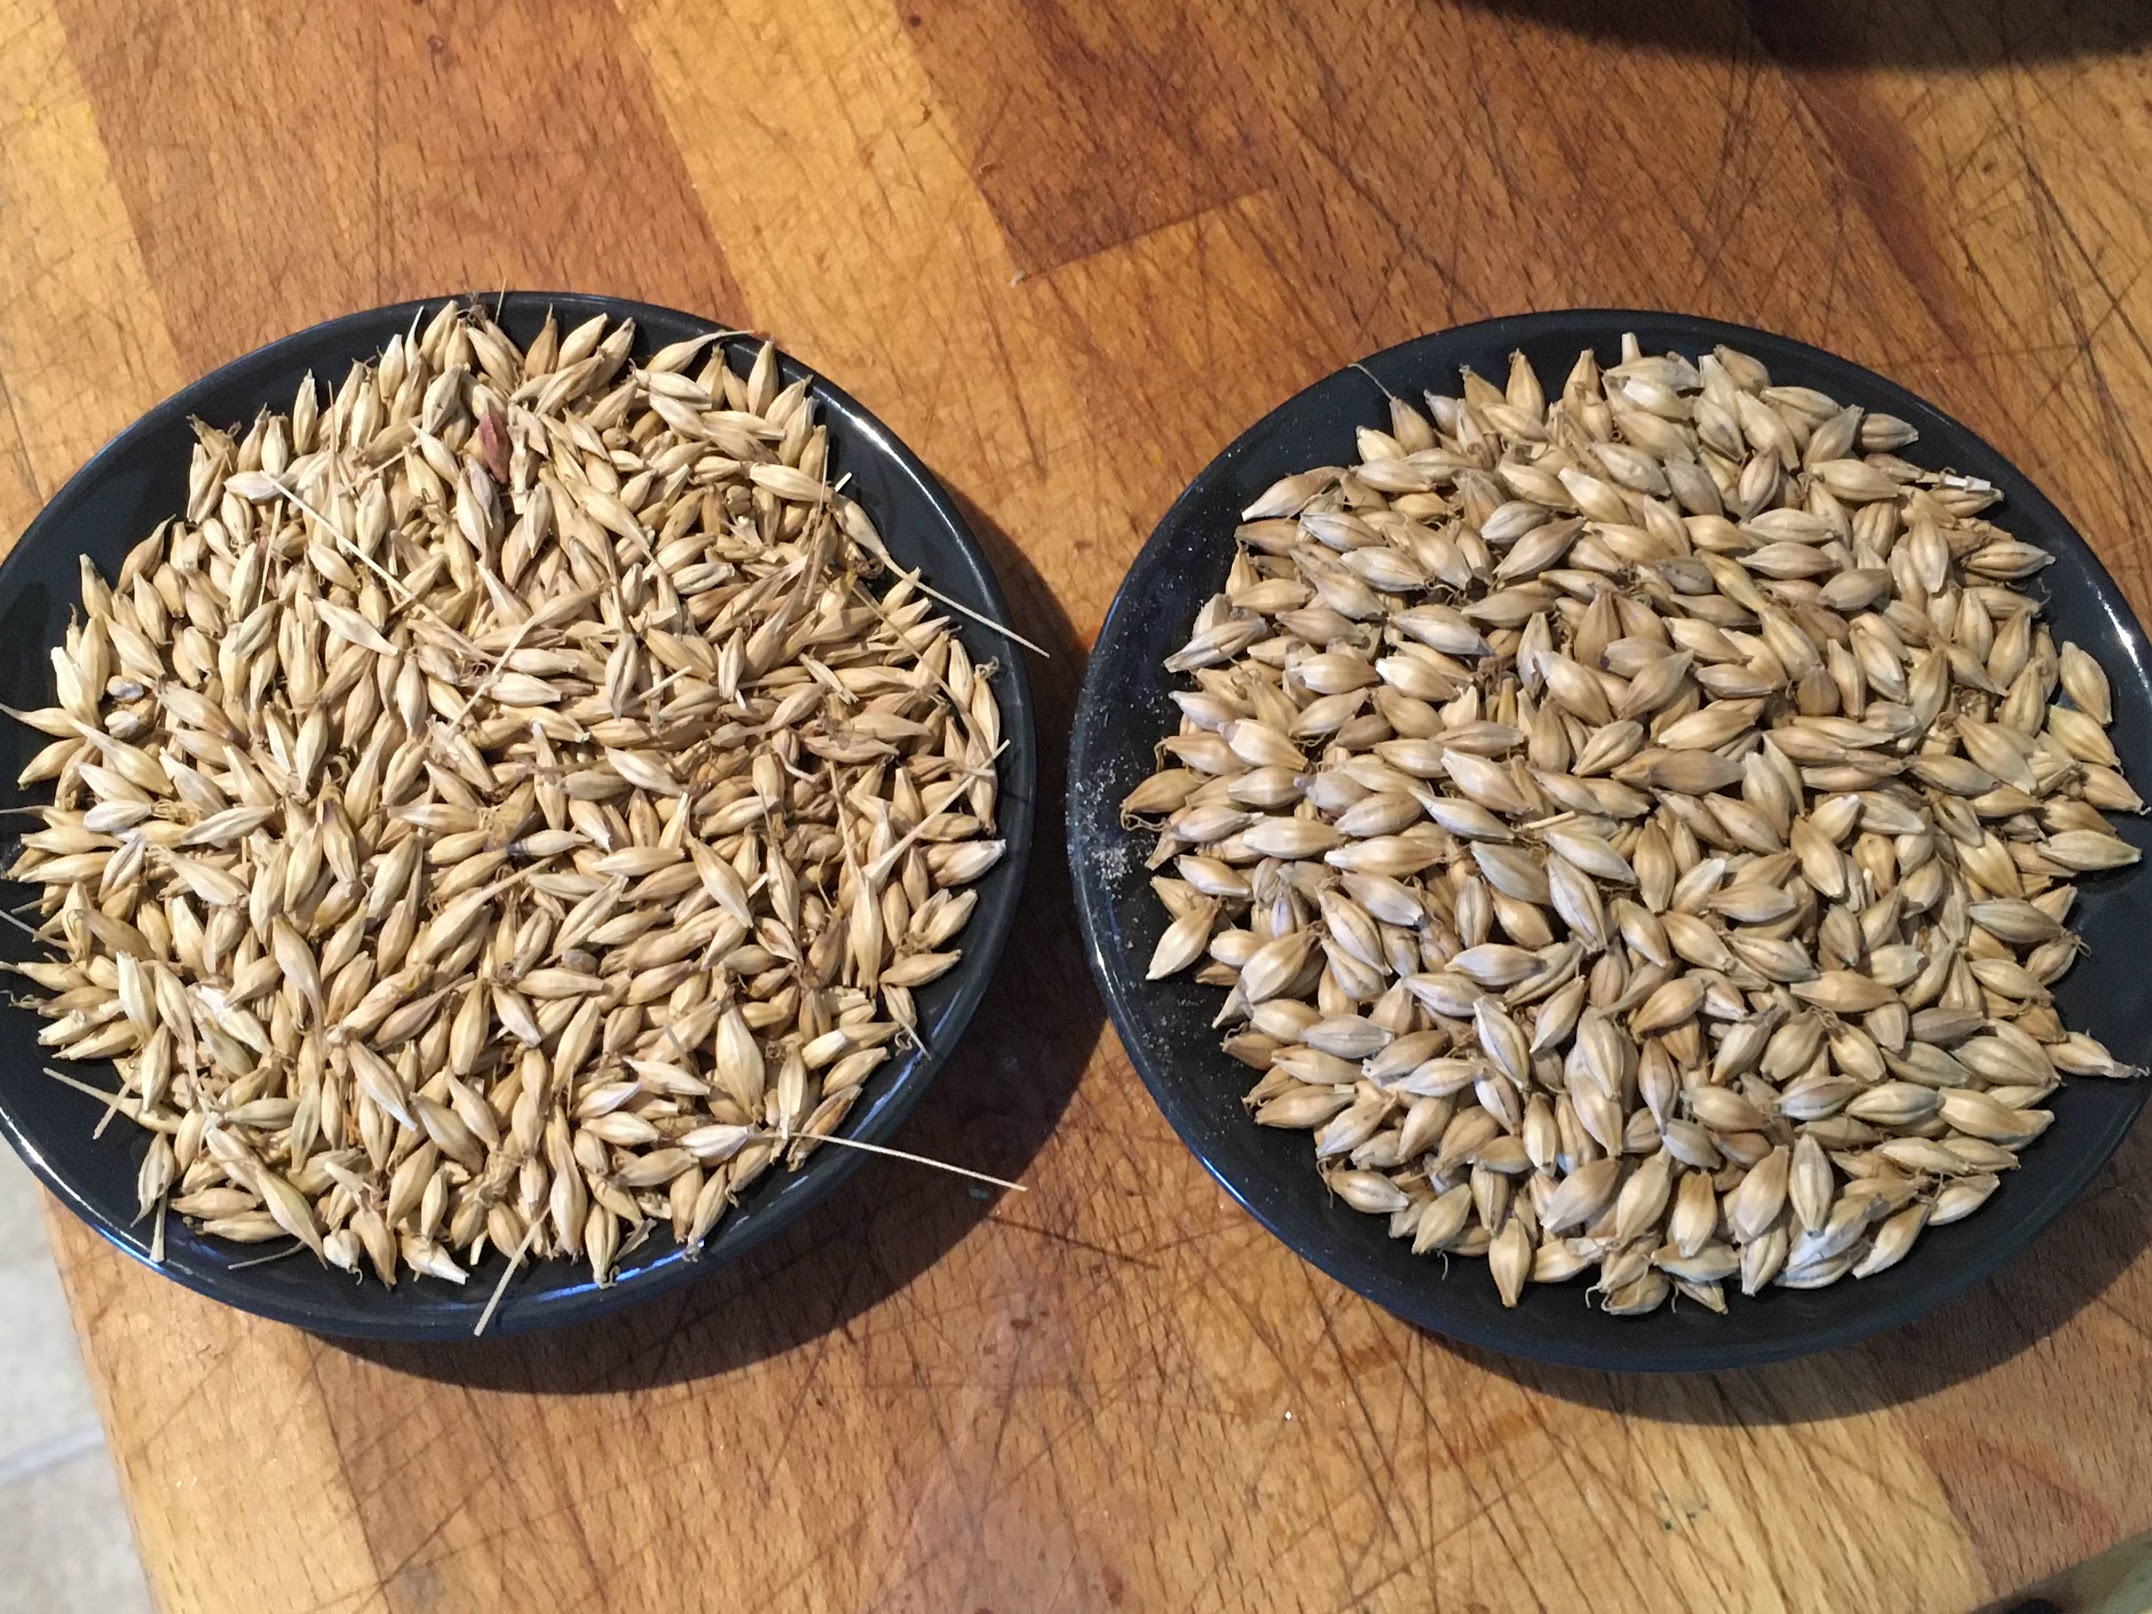
Check out the size difference! Bere on the left Chevalier on the right.
The awns on the Bere barley are very tough, some of them didn’t break off even after malting.
The recipe: I took 3 oz of the Bere malt and roasted it at 400F until it was very dark. I also took an extra 8 oz of raw Bere barley and roasted it at 350 until it was a nice brown colour. For hops, I used some Hallertau for boiling and then some Perle and Saaz at the end for 30 IBU. Yeast: Whitelabs Edinborough Scottish Ale.
Brewing: Just a single infusion at 149F for an hour.
The original gravity was low as expected. According to Beer Tools at 75% efficiency, my O.G. should have been 1.061. Instead, it was 1.051 making the efficiency around 62%. However, my final gravity was very low at 1.002, probably due to my low mash temp. This puts the a.b.v. at 6.3%, slightly higher than the 6.1% predicted by Beer Tools.
The flavour: Clean and dry with some caramel and toasted bread flavours. Very little bitterness present but that’s what I was going for. It’s a very easy drinking beer.
Well even though I meant to scale back my gardening this year I just couldn’t let a year go by without growing some barley. I had given up one of my two garden plots and I was trying to talk myself into just growing boring old vegetables when my friend Andrew from Locality Brewing suggested growing some test plots on a section of their land. Andrew and his wife Melanie are in the process of creating a farmhouse brewery and cidery. For more info on what they’re doing check out their website. I had quite a few varieties that I’ve collected over the years so we thought it would be interesting to see what would work on their farm. We planted small beds with Alba (6 row), Copeland, Conlon, Chevallier, CDC McGuire (Hulless), some Jet and some Bere barley. All together it was about 1,000 sq. feet.
Unfortunately, this year was a great year for weeds, we had lots of rain and cool weather this spring which also caused some lodging. I couldn’t tend to the weeds as much as I would have liked and they just seemed to erupt during a few weeks in June and quickly took over. The big surprise, however, was the Bere barley. It has grown and ripened so fast I’ve been able to harvest most of it already! It seemed to outpace the weeds. I’m hoping to have enough to make a batch of beer with some more for planting next year. I’ll be harvesting the rest of it this week. As for the other varieties, we’ll have to wait and see, so far the Chevallier looks pretty good.
Bere barley was traditionally grown in areas with a short growing season and is able to grow in sandy soil. It’s still grown on the Orkney Islands in Scotland. Here’s a little blurb from Beer and Brewing about Bere or Bygg. https://beerandbrewing.com/dictionary/izxSEht6Z2/ The drawbacks to Bere are it’s low yield compared to regular barley and it’s inconsistent kernal size. Not a big deal if your malting it yourself, I’m just interested in the flavour, will it be noticeably different? Will it be worth growing again? Stay tuned to find out!
Prepping the beds.
Finished planting. No opener? no problem. Andrew using a hacksaw as a bottle opener
At 20 days this is the longest germination I’ve ever done. I actually wanted to kiln this a couple of days earlier but it was pouring rain so it had to wait. It was already spread out to wilt so a couple of days of wilting is actually more historically accurate anyway.
What I was worried about was mold developing and this did happen on a small handful of grains. Wherever the husk had split, mold grew on the exposed starch and there were also a few pink grains indicating some fusarium mold but not a big deal I just picked them out.
The temperature in the garage couldn’t have been more perfect for the whole 3 weeks with a maximum temperature of 14C. It stayed between 12-14C most of the time. I started with a 44 hour steep changing the water once after 24 hours. If you’ve read my earlier posts you’ll know that an unaerated steep is necessary for a long slow germination. The moisture content was only 40%, slightly less than my target so I weighed enough water to add another 2% and added that while turning over the next two days.
The barley I was using was the 24 lbs. of Chevallier I grew last summer. I lost about three of my beds to animals of some kind, most likely rats or mice and maybe the odd squirrel. This happened only in the beds that did not have the chicken wire support and because they were not supported there was some lodging. When this happens it’s much easier for the critters to access the seed heads. This only happened a few weeks from harvesting. Quite disappointing but it was my own fault for not having enough chicken wire.
Continuing the drying of newly picked grain at home.
Here’s how the germination went:
Day 3 – Chitting visible
Day 6 – Acrospires at 1/2
Day 12 – Acrospires at 3/4 Roots starting to wither a little
Day 17 – Barley spread out to wilt
Day 20 – Moisture at 27% Kilning day.
Kilning looked like this:
Day 1 10 hours at 45C (average malt temp)
Malt brought in at room temperature overnight 20% moisture
I think it could have used another 4 hours at drying temperatures and maybe another 2 at curing temperatures, but this project was pretty exhausting since I didn’t actually know how long it was going to take. At least now I know for next time to set aside a minimum of 24 hours total time for kilning for this amount of malt. Unfortunately, historically this is a normal amount of time for a kiln directly fired and without fans, so I guess that’s kind of a win?
This malt has a nutty character with a very mellow smoke aroma. By mellow I mean the strength of the smoke is similar to the smell of clothes the day after being near a campfire. It’s present but not harsh or overpowering. This should make an awesome beer.
Raising the pH of the steep water with Sodium Hydroxide has almost eliminated the bitter grassy flavours I was getting when malting oats. Please read this post first on my malting process. This beer is waaaay better than the last oat beer which made me give up on oats, I even state in my book that when malting oats, off flavours are unavoidable. I reached this conclusion after trying different sources of oats and hulless oats as well. I kept getting grassy flavours developing a few days into the malting process. I’m still not 100% sure what the source of these flavours are but according to these articles it could be the oxidation of lipids.
In Optimization of Enzymatic Activities in Malting of Oat by E. Hosseini, M. Kadivar and M. Shahedi …”Unlike other types of cereals, fat exists throughout the grain that possesses much lipase activity in its neighborhood and its native condition. During germination, the level of free fatty acids (FFAs) rises remarkably and the subsequent oxidation of these acids in storage of malt produces hydroxy acids which result in development of bitter taste.” Also in this article Role of lipid reactions in quality of oat products. by Pekka Lehtinen and Simo Laakso “In oat, a lipoperoxidase (EC1.11.1.-) activity is responsible for the conversion of hydroperoxides to relevant hydroxyacids (Biermann and Grosch 1979). These hydroxyacids are suggested to be partially responsible for the bitter taste associated with the enzymatically active oat (Biermann et al. 1980).”
If I’m understanding it correctly, the first article suggests that by reducing Lipase activity one can reduce this oxidative effect. Further on in the article there’s this . “Liukkonen et al [15] reported that lipase activity is sensitive to alkaline pH above 8 and it subsequently dropped.” However, the experiments in this article only show the effects of pH between 3 and 8. So this is why I thought I’d try increasing the steep pH to 8 or above to see if it would have any positive effect. It only took 0.4 grams of lye added to 4 Litres of water to change the pH from 6.3 to 9.5. It’s a minuscule amount but if you’re going to try this be careful when handling lye as it can burn your skin, always where gloves and always add the lye to the water never the other way around. I wonder if it’s the Sodium Hydroxide that has an effect on lipase or is it just the pH level and would naturally alkaline water have the same effect? I guess this will be my next experiment.
The beer is sort of yellowy brown. It’s got a nice head and mouthfeel and a creamy chocolatey sort of flavour. If I’m really looking for it, I can taste just a hint of the grassiness but it’s very faint and disappears as soon as I detect it. I can drink this beer without noticing it at all. I did a step mash for this one with an hour at 107F, 45 minutes at 125F and then an hour at 153F. My pre-boil gravity was pretty low at 1.036 which I think was due to my low germination rate of 70-75% and the fact that oats do not have the same diastatic power as barley. So I boiled for 2 hours to up the gravity 1.053. Had I only boiled an hour the gravity would be 1.045. Final gravity was 1.012 for an A.B.V. of 5.36 but a final volume of only 4 gallons. The colour comes from some of the roasting I did, it’s got 10 oz of toasted oat malt (biscuit) 1 hour at 350F. 4 oz of a chocolate oat malt +30 minutes at 425F and 4 oz of roasted oat malt +45 minutes at 450F. The malt itself was kilned quite high with an air-on temperature of 195F but the malt temp only reached 190F. This high kilning may also have contributed to my low numbers.
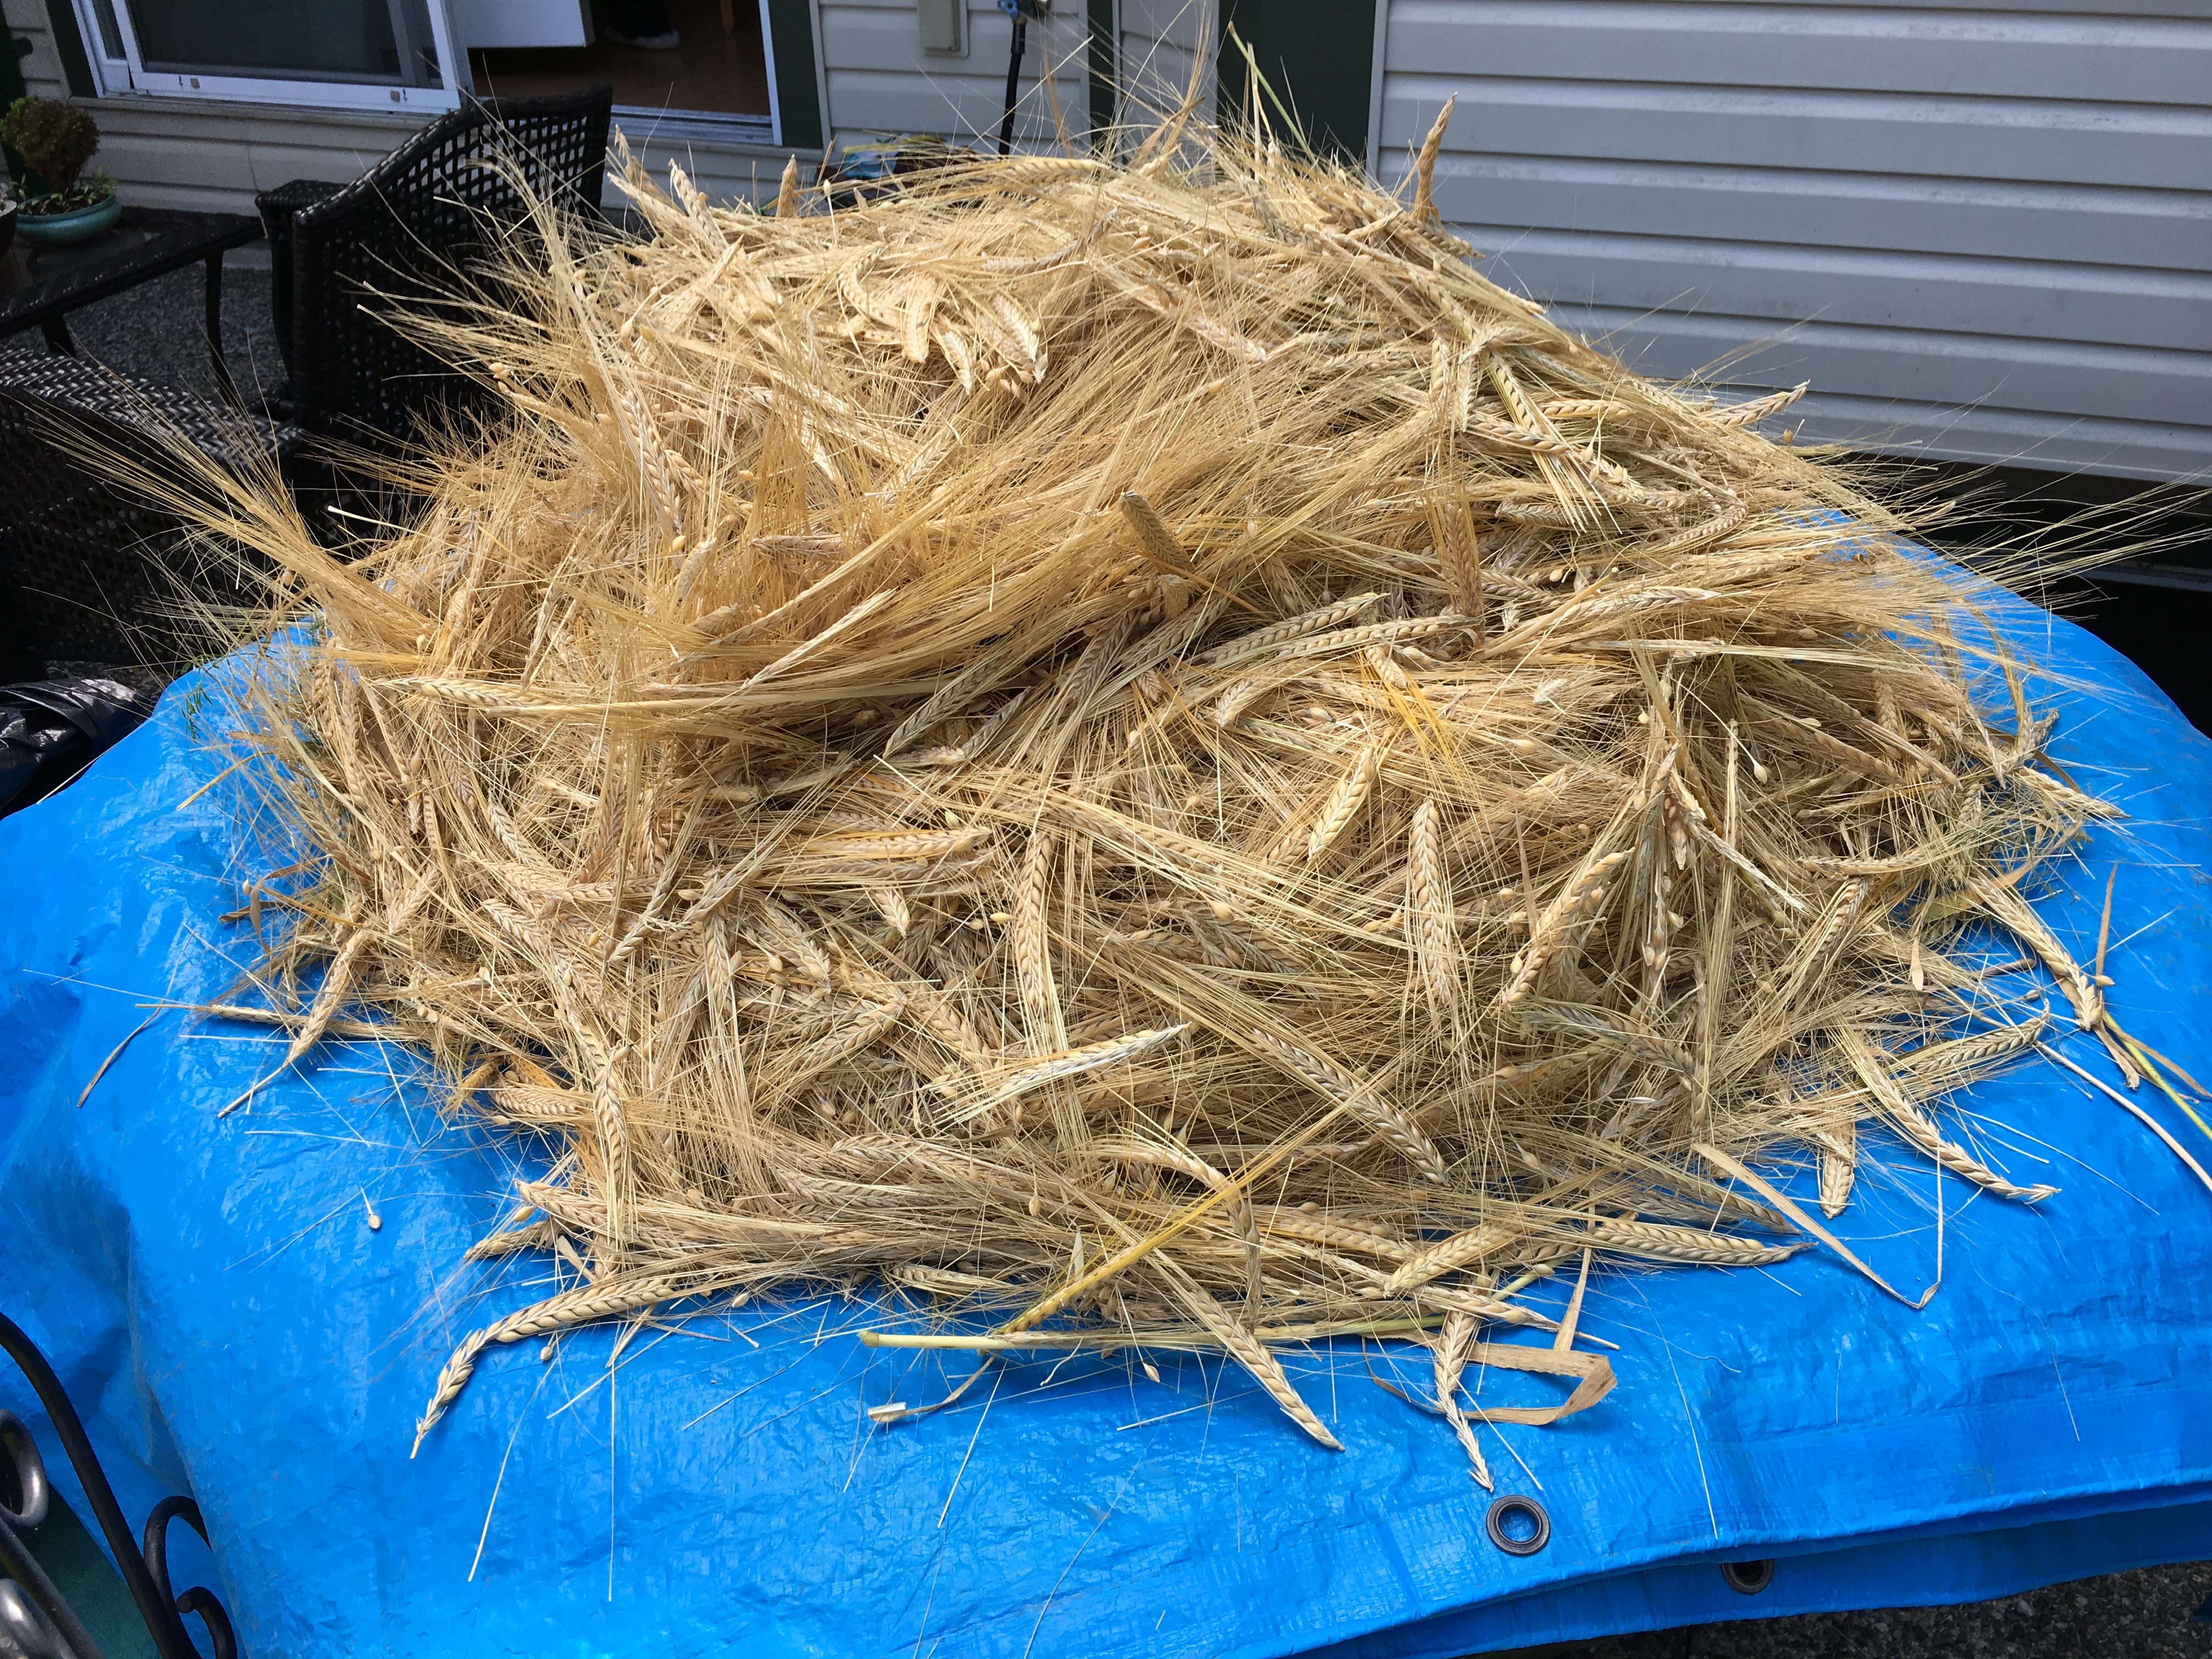
WHAT?! Harvest time already?! I only get to my garden once a week because it’s a 40 minute drive away from where I live so I was shocked to see a lot of the barley ready for harvesting today. Last week I figured it was 3 weeks from harvesting, I’m loving this Chevallier barley. However it does have a fatal flaw, it’s BIG, big and tall. This trait is probably why it fell out of favour with growers. There’s a much higher risk of lodging with tall stalks and the heads are quite heavy which also doesn’t help, but it does make for a high yield compared to other varieties that I’ve grown. The two beds that didn’t have chicken wire lodged and have been munched on by various critters. Even two beds with the chicken wire fell over to some extent but not enough to crease the stalks, they were just leaning to the side. I wasn’t planning on harvesting today so I had to improvise with a heavy duty garbage bag. I picked about 15 lbs worth today and there’s still another 60% which was still looking too green. I’m pretty sure I’ll be able to pick all of it next week.
I’m very surprised and excited about the results of this experiment. If you’ve read my past experiments with malting oats then you’ll know the trouble I’ve had with it. Even though I’ve tried different brands and hulless vs. with hulls I’ve always noticed a grassy flavour to it, and by grassy I mean like freshly cut lawn clippings or even green corn husks. I still do not know what causes this but it seems to appear only 1 or two days after steeping. It has been suggested in this article by E. Hosseini, M. Kadivar and M. Shahedi that rancid bitter flavours are due to the oxidization of free fatty acids and they show that increasing the pH of the steep water has a positive effect on enzyme activity which may have an affect on the development of rancid flavours. Though, I’ll admit I found this article confusing, maybe you guys can make better sense of it. The folks from Breiss malting suggest in this podcast that bacteria present on the oat husk is what caused off flavours to emerge in their trials.
Germination was not great at about 70% for all three batches
Steeped for only 4 hours to achieve a 42% moisture content.
So whatever the reason, I wanted to see if adjusting the pH of the steep water would have any effect on flavour. The first batch of malt would be my control using regular filtered water. The second batch had the steep water adjusted to a pH of 9.5 (only because I couldn’t hit 8 due to the small amount of Sodium Hydroxide used). The third batch was subjected to a 1 hour steep in a .2% lye solution which had a pH of around 13 in order to disinfect the grain from any mold or bacteria. Then it was rinsed and steeped for another three hours in regular filtered water.
0.4 grams of lye was added to 4 Litres of water to change the pH from 6.3 to 9.5 8 grams of Lye per 4 Litres was used for the third batch.
And the winner is … the 9.5 pH batch. Within a few days of steeping I noticed that it was not developing as much grassy aroma as the other two. Even after mashing this malt it’s tasting much more like a bowl of oatmeal than a bowl of cut grass. I still have to brew with it as a final test to see if this is actually working but I’m very optimistic. Also the brix of the 9.5 batch after mashing small 4 oz. samples was 13, both the normal batch and the disinfected batch were just 10. Of course these mash results could have been different had I adjusted the pH of the mashes.
All three batches were steeped at 12C 54F and germinated for 5 days at 16C 61F.
All three batches were also dried and kilned the same; 12 hours at 21C 70F with fan. 8 hours at 30C 86F with fan. 8 hours at 50C 122F no fan. 4 hours in the oven at 185F
Tomorrow I’ll start to malt another 10 lbs. in order to make another attempt at a 100% oat malt beer.
Mini-mashing 4 oz. batches.
After mashing for two hours it still did not pass the iodine test.
After mashing, before boiling. The 9.5 pH batch in the center had a brix of 13, the other two 10
It’s taken a while to get this one to work. According to the descriptions I have, Brumalt starts with a high moisture content (48%) and is well modified. After a 6-8 day germination the malt is piled up (depths vary according to descriptions) and it’s allowed to heat up to 50C in about 24 hours. After the oxygen is consumed and enough carbon dioxide accumulates it eventually cools down with the whole process taking about 30-40 hours. According to Briggs “Under these conditions rootlet growth ceased, the starchy endosperm became pulpy and the sugars and amino acids accumulated…” The malt is then dried at 65 C and kilned (or cured) at less than 100 C or 212F producing a dark malt at 15-30 or even 40 EBC units and yields a “sugar and melanoidin-rich malt when mashed”
Now this is the tricky part for the small scale home maltster but I’ve recently discovered that when “piling up”, the amount of malt used vs. the container size is very important, otherwise you may not reach 50C or it may take a long time, like 3 days. I’ve tried different amounts for different lengths of time in different coolers and containers and I’ve found that 10 lbs in a 5 gallon cooler works perfectly. The cooler mimics the conditions of a larger pile of malt and I’ve managed to reach a few degrees above 50C.
Interestingly this technique is mentioned in the London and Country Brewer of 1736 in Chapter 2. “Now when it is at this degree and fit for the Kiln, it is often practised to put it into a Heap and let it lye twelve Hours before it is turned, to heat and mellow, which will much improve the Malt if it is done with moderation, and after that time it must be turned every six Hours during twenty four; but if it is overheated, it will become like Grease and be spoiled, or at least cause the Drink to be unwholsome” Also in this text is this description of the malt near the end of germination: “and when it is fixed and the Root begins to be dead, then it must be thickened again and carefully kept often turned and work’d, that the growing of the Root may not revive,” This quote describes the withering of the roots which is more evident with traditional longer germinations. Purposely withering the malt on the floor was also a common practice when floor malting and this was done by spreading out the malt to a very thin layer of 1 or 2 inches. Just for fun I thought I’d try drying out the malt a little by spreading it out to see if using a somewhat dryer malt had an effect on this process. I was thinking that this hot couching process might be the way to add more colour to my diastatic brown malt. Unfortunately, when the malt has undergone a long traditional germination or has been withered the moisture content will be lower, 27% in my case. I believe that with a lower moisture content the proteolytic enzymes are not as effective as a malt with a higher moisture content when the temperature rises.
I’ve created dark malts before by stewing the malt in my kiln at 50C immediately after germination. 16 hours of stewing seems like the magic number and then drying and kilning as you would for a pale malt. But I wanted to see if I could get a very dark malt naturally with this hot couching method instead of stewing it in my kiln. The second batch uses the same Skagit Valley barley as the first one given to me by Skagit Valley Malting. Both started with a 46% moisture content using 8 hour steeps and 8-12 hour rests. Both were well modified with acrospires reaching the full length of the grain having germinated at roughly the same temperature. The only difference is that the first batch withered for 28 hours before being put in the cooler. To wither I simply spread it out to an inch depth on window screens with space under the screens for air-flow. After withering it had a moisture content of 27.5% whereas the un-withered batch had a moisture content of 40%.
The first batch reached 51 C, its maximum temperature, after 32 hours in the cooler. The malt was covered loosely with dish towels for insulation but allows for some oxygen. (I’ve tried it with an airtight lid but it doesn’t work) I then let it cool down for another 16 hours, for 48 hours total. When I took it out the temperature was at 47 C. It then went in the kiln to dry at 65 C (air on temp). The second batch went into the cooler at 40% moisture having gone through the same germination regime minus the wilting. It was a little faster and reached 51C right around 24 hours, just like the textbook says! I then let it cool down to 45 C for a total of 39 hours in the cooler. This malt was then dried for 12 hours under 50C which also makes a difference due to the fact that the enzymes are still active during this time especially at the beginning.
There’s huge difference in colour due to the difference in moisture content at this “hot couch” stewing phase. Not only are the enzymes more effective with more moisture but continue their activity during the longer drying phase after the “hot couch”. Perhaps if a traditional floor malt was not as dry as my “wilted” malt that this method played a role in adding colour to the diastatic brown malt of the past.
Malt # 1 Withered Malt # 2 Not Withered
46% moisture Same
5 day germination acros. full length Same
Withered 1 ” depth on screens 28 hours
27.5 % moisture content
In cooler 48 hours max temp 51 C In cooler for 39 hours max. temp. 51 C
4 hours drying at 65 C (air on temp) 12 hours drying (malt temp. 40-50C)
4 hours at 205 F 3 hours 65 C (Air on temp) 55 malt temp.
Not much colour (even after another 3 hours at 200F) . 4 hours 200F (malt temp max 168)
I’ve been wanting to visit the Skagit Valley Malting facility for a while, mostly because it’s only an hour and a half away from where I live. In a relatively short time span, they’ve expanded to the point where this year they will be able to store 12 million pounds of grain in their silos. They’ve got quite a few videos on their website FAQ section describing their operation if you haven’t seen them already they’re worth a look. They’re also on Facebook where you can see lots of video footage and photos.
What I think is very cool about this place is they’re malting locally grown grain, all grown within 12 miles (except for some organic grain which is grown in Delta B.C. which is literally a stone’s throw away from my garden!). The Skagit Valley is mostly known for it’s seed and tulip bulb production. Most of the barley grown here used to go to the commodity feed market. Now Skagit Valley Malting gives local farmers a new and better market opportunity. As it turns out because of the temperate summers this area is very well suited to grow barley and since they buy the grain directly from the growers they can work together to select and grow the best malting varieties for the area.
The Silos
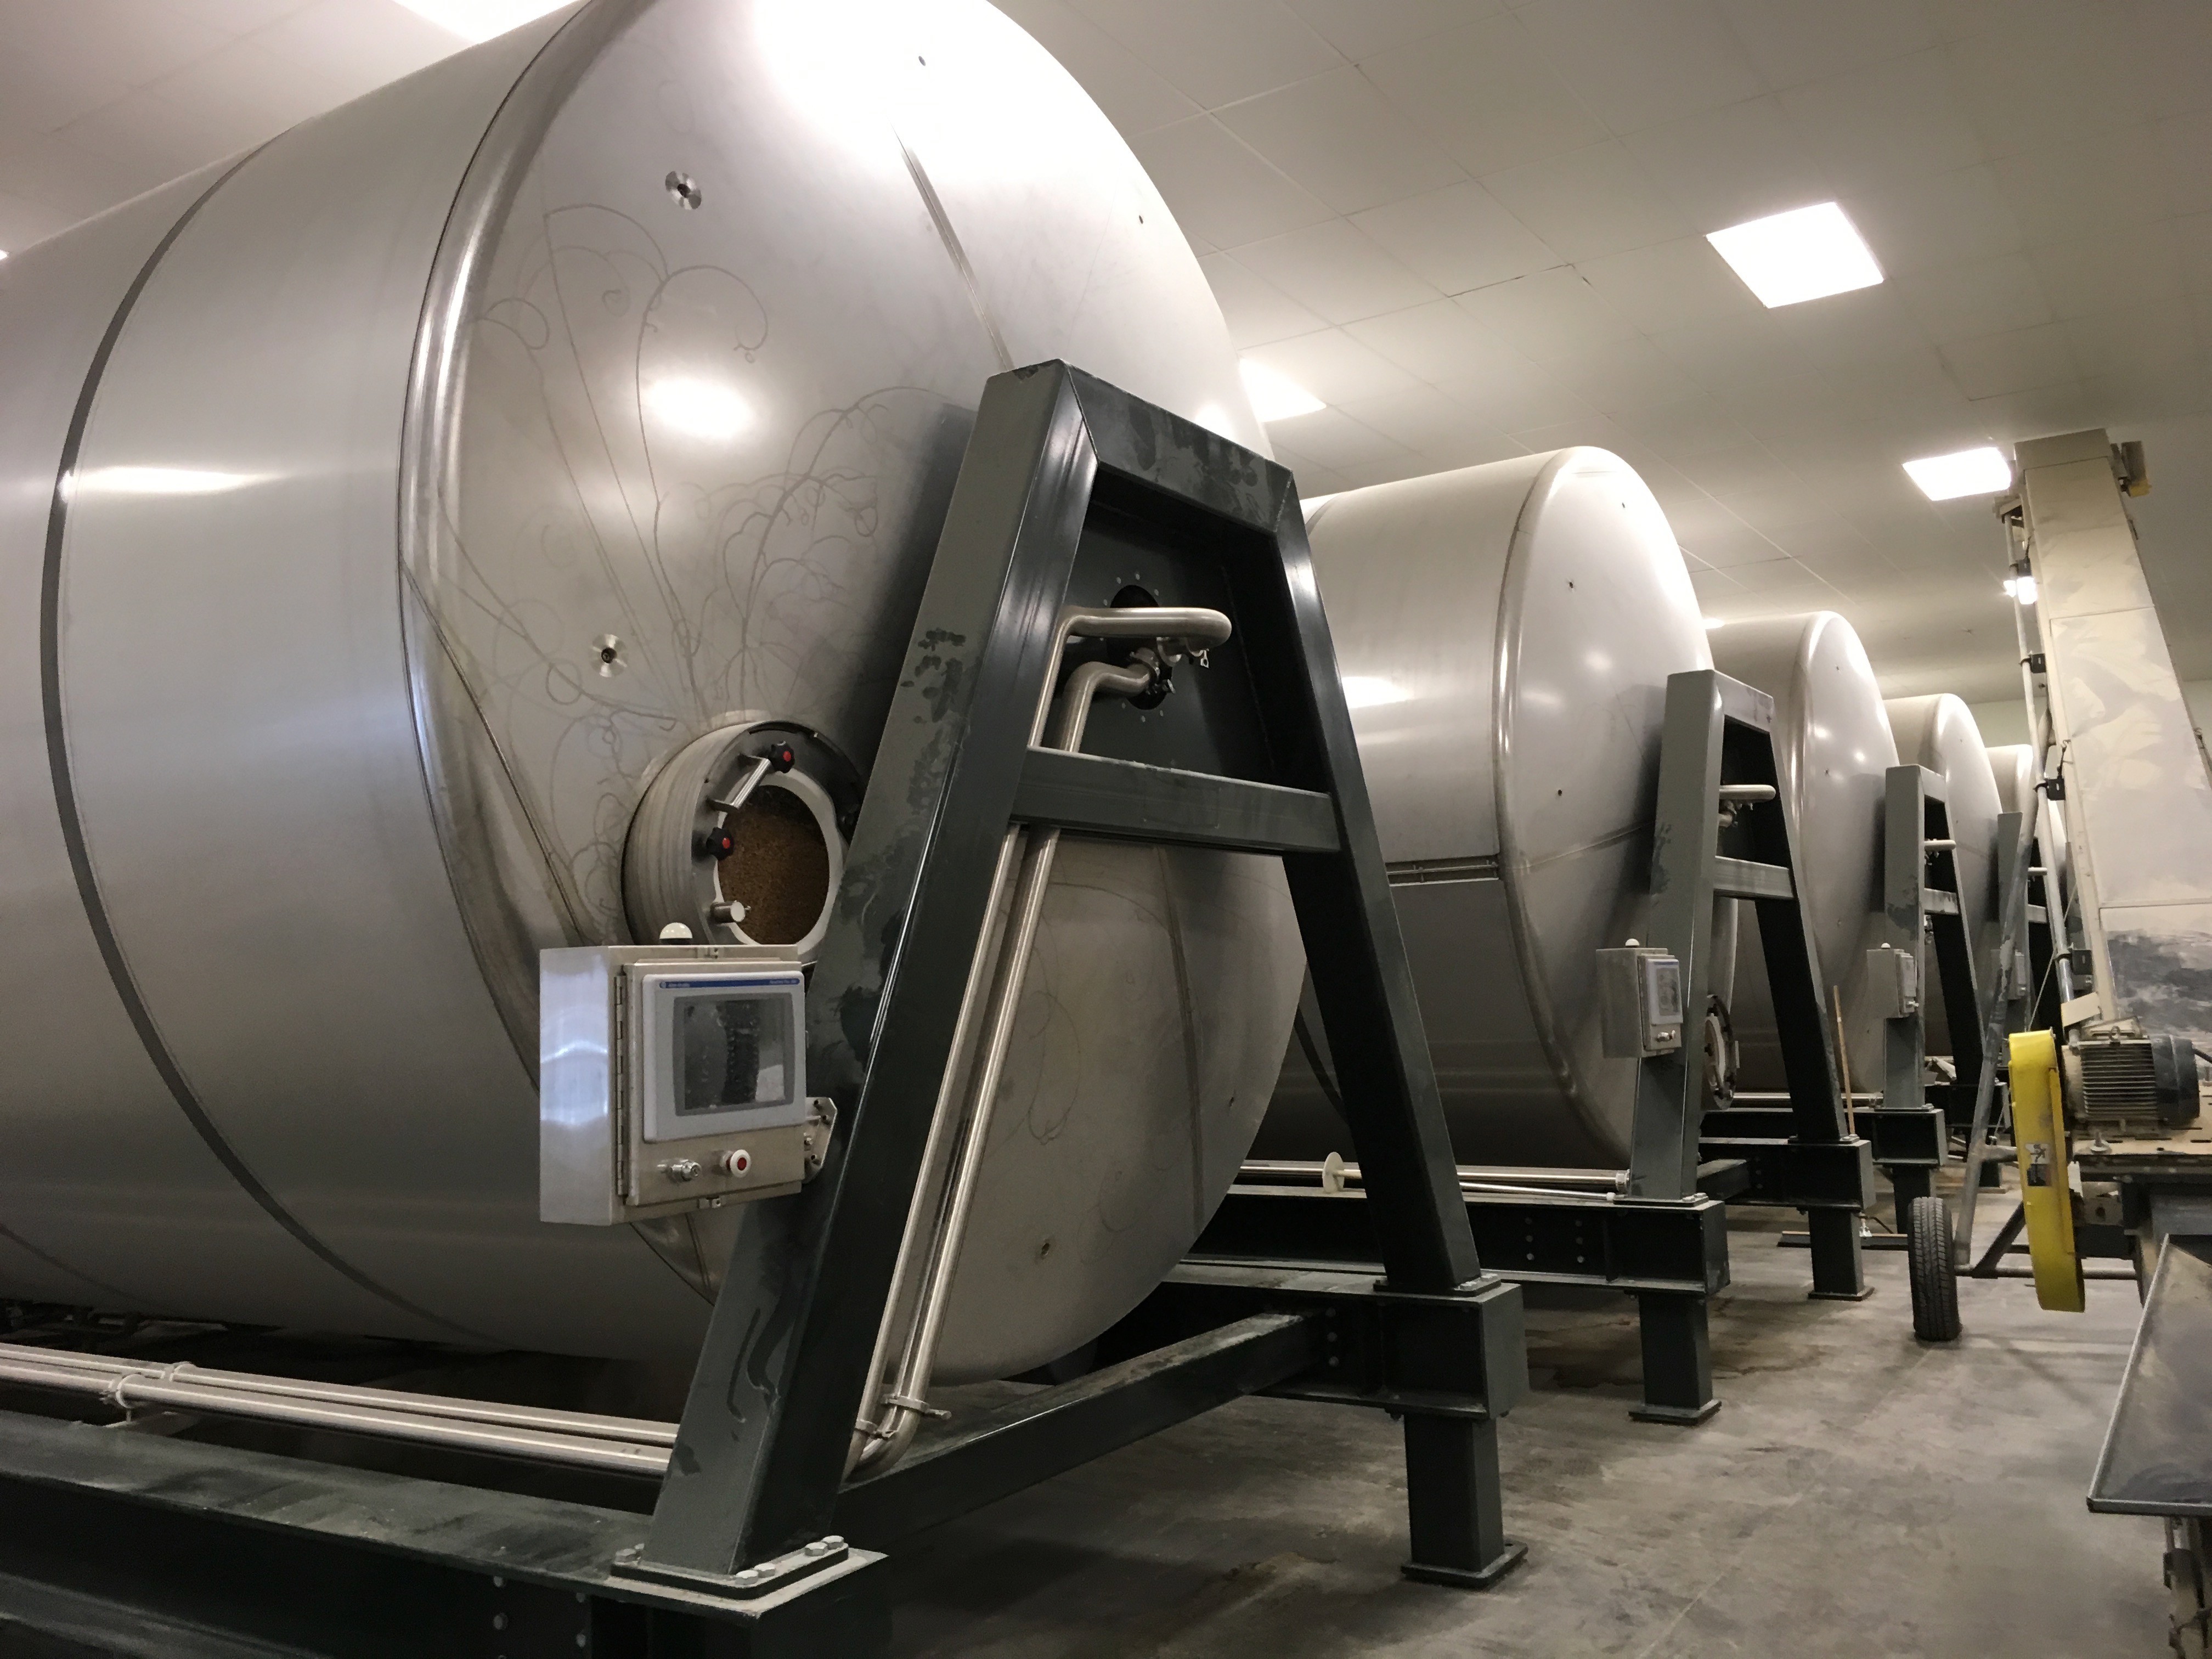
How they malt their grain is truly innovative. This is the really cool part, their patented single vessel units do everything from steeping to finishing, what comes out of the vessels goes right into the bags. These things are huge and were designed and built on site. Each one holds 9 tons of barley. Firstly, water enters the vessels through a pipe in the side. The grain is steeped using an absorption method, that is, only the specific amount of water is used that will achieve their desired moisture content. Because the vessels are being rotated the barley absorbs the water uniformly. The vessels continue to rotate throughout the germination. Temperature and airflow are controlled through more pipes that run the length of the vessel inside. This is how the grain is kilned and finally the wedge-wire screens inside provide enough abrasion to de-culm the malt once it’s dried. Air is then sucked out of the vessel taking the root material through the waste port and leaving the grain clean and ready to bag. How awesome is that! I had asked if they sold bags of raw barley which they do but I would have to buy 2,000 lbs of it hmmmm, I considered that for a minute. Instead they gave me a 50 lb. bag to play with in exchange for blog posts, fun.Special thanks to everyone at Skagit Valley Malting and to Adam Foy and Scott Pelton for answering all my annoying questions
The malting vessels
They’re planning to fill this space with more vessels. On the right side is the original pilot vessel which is now used for test batches.