RSS

Category Archives: Diastatic Brown Malt

This beer was made without roasted malts!


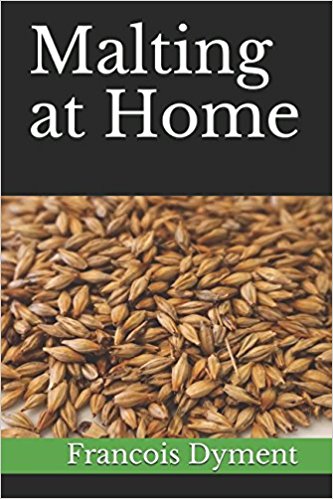
Not yet fully carbonated but I couldn’t wait any longer!  This beer was made with a single malt sent to me all the way from Montana from Ryan Pfeifle at Farm Power Malt.  Ryan your “samples” are on their way!  I’ve been talking to Ryan about diastatic brown malt and the theory that a lot of colour can be achieved with a stewing phase at around 122°F 50°C. The question that I’ve been trying to find out lately is whether or not this was part of the malting process for brown malt back in the 18th century or was most of their colour achieved by high temperatures while there was some moisture present thereby partially caramelizing the malt like a Munich malt. This may be an impossible question to answer but it’s leading to some fun experiments.

Believe it or not, this malt was kilned under 200°F and does not have any caramelization.  However, it did undergo a proteolytic stewing phase at 120F 49C after germinating which obviously after kilning has produced a wack-load of melanoidins. Talk about rich wow! This beer is super malty, full of dried fruit flavours like prunes, raisins, and cherries which are covered in caramel. Unfortunately, I made the shameful mistake of underpitching my yeast and the fermentation stopped at 1.029 (O.G. was 1.075). It tasted great, not too sweet for me, so I bottled it. In hindsight, I should have given it a stir and another week. Luckily I reserved some yeast with some of the beer and I left this at room temperature to see if it would ferment down and it did! After one more week, the gravity is 1.018.

This sample fermented down to 1.018. Attenuation =76%

My numbers were very surprising. With 11.85 lbs. of malt used in this recipe my gravity should have been around 1.062 at 75% efficiency, according to my brewing software, but I ended up with a whopping O.G. of 1.075. With a potential final gravity of 1.018, my ABV would have been 7.45%.  As it stands now the ABV is at 6%. I gave it a one hour mash at 150°F. Note:  I started with a high kettle volume (7 gallons) and boiled for two hours leaving me with a final volume of just over 5 gallons.

The flavour reminds me of beer made with a lot of Special B malt which makes me think this malt would be perfect for a Belgian Dubbel or perhaps it would be well suited for a dark lager, smooth malty and dark but not roasty. Or perhaps since the flavour is so bold it would be great in a barleywine. At the moment this malt is still being developed so they’re still tweaking the recipe. Ryan’s got a very cool malting system which he built from scratch on their farm so be sure to check out their website!

 
9 Comments

Posted by on January 25, 2019 in Diastatic Brown Malt


1804 Porter taste test

DSC00525This is the Porter based on the Barclay Perkins Porter from 1804 with Brown malt and Pale malt. I shouldn’t call this a taste test because that would imply that I haven’t tried any when in fact it’s almost all gone. But hey, can you blame me? It was the perfect beer for the Christmas holidays. After all the food, desserts, and chocolate it was nice to finish the evenings with something not sweet but full of dry roasted flavours. Dark toast and coffee dominate, the smoke is almost non-existent. It’s so subtle it’s  presence could be mistaken for a slight sourness but I recognize the flavour from my other pecan wood  brown malt porter. The hops are very low which doesn’t surprise me. These were the hops I picked on River Rd. just outside of Fort Langley. I have no idea what kind they are but I’m guessing the alpha acid level is around 3% so I could have used a lot more. The colour is gorgeous, no complaints there and it’s got a full mouth feel. The head doesn’t stick around for very long, but considering the disastrous brew day and the stuck sparge I’m extremely happy it turned out so well.


1804 Porter

What a disaster. This beer was loosely based on the 1804 Barclay Perkins TT recipe from Ron Pattinsons book The Home brewer’s Guide to Vintage Beers. I didn’t think I was going to use the whole batch of brown malt in one recipe but this gave me a perfect excuse to do just that. So 4lb of non-diastatic brown, 2 lbs of my diastatic brown malt samples in place of the Amber malt in the recipe and 6lb of pale malt. I also added 1 lb of pilsner malt just because I had some and to help with conversion. Everything was going great until I tried to sparge. This mash got stuck and I mean really really stuck. With brown malt being roasted it is very friable, the husk breaks down in to very small pieces and the inside is a fine dusty powder which turned into cement at the bottom of my mash tun and completely plugged the false bottom. A larger mash tun would have helped and definitely more rice hulls, a lot more, I would suggest one pound minimum. I tried giving it a stir – nothing, I tried blowing some air through it – still nothing. I finally ended up ladling it out into a bucket and throwing all the sparge water in, sort of a batch sparge and then just pouring it through a strainer, what a mess. I’d be very surprised if this turns out. I ended up with 4.5 gallons of a decent looking dark beer with an O.G. of 1.064.  It’s been bubbling away nicely and has just started to slow down, my fingers are crossed. I thought this post might at least be useful for anyone else trying to make this recipe,  Cheers!DSCN1180

 
2 Comments

Posted by on December 5, 2014 in Brown malt, Diastatic Brown Malt, The beers


Tags: , , , , , ,

New malt kiln

Still on the quest for a more authentic diastatic brown malt. I was pretty disappointed with the soot that appeared on my last batch and I wanted to play around with using higher temperatures so a new kiln was in order. Unfortunately I live in a townhouse, otherwise I would have built one by now using cinder blocks or anything I could get my hands on. Instead I had to settle for something on a more portable scale. I had originally thought of using a barrel so that I could take it to a campsite close by and put it over a fire pit, that way I could try using straw as a fuel. Then I figured why not use the gassifiers in the barrel, it’s clean, very safe, and I get one hour of burn time for each load of pellets. Every time I try burning straw it burns faster than paper, I still don’t get how this was used in the early malt kilns.

As I mention in the video I just didn’t have the time to perfect the design and my malt was at 10% moisture level after air drying for two days, it was more than ready to be kilned. The temperature crept up to 250 by the end of the first hour, there was still steam coming off at this point. During the second hour the temperature rose to 275 and then to 300 during the third. I knew this would probably be too hot for the malt to have any diastatic power left to convert itself but I wanted to see how a faster and hotter kilning would affect the colour.  My results were most likely inaccurate because even though my oven thermometer read these temperatures the heat coming out of the small holes in the barrel was much higher. The 4 oz. test batch came up with a 1.020 original gravity after an 8 hour mash.

Well at least now I know I can make a pretty descent blown malt, check out the snapping action in the video. As well this would be a great way to roast your grain outside, you could easily do 7 pounds at a time this way.


Tags: , , , , , ,

Diastatic Brown Malt 2014


DSCN1077


Last year, after my first attempts at making diastatic brown malt I realized that I had just scratched the surface of a vast subject but that it was definitely worth further experimentation. The beer I made was very unique but very light in colour. This year I thought I’d collect some useful data by pulling out 1/2 lb samples from my “kiln” at 1/2 hour intervals starting from the 3 hour mark, which is where I stopped last year. I kilned for 6 1/2 hours before running out of malt. My final conclusion – I could still go darker! To do this I think I could increase the heat of the fire to 300 F (but that’s for the next batch). The picture above shows from left to right: My pale malt, 3 hour brown malt, 3 1/2 hr., 4 1/2 hr., 5 1/2 hr., then 6 1/2 hr. The 61/2 looks lighter because it’s cloudy. Check out the jump in colour from 4 1/2 to 5 1/2. It was around the 5 hour mark that the temperature rose to 300F. Just to clarify these times are the curing times. I had air-dried this malt for about 36 hours and then kilned it for 5 hours with one gassifier no higher than 150F.

6 1/2 hour malt

6 1/2 hour malt

The colour of the malt did not change as fast or as much as I thought it would but I’m very excited about the 6 1/2 hour malt. Despite looking quite charred in places it did have some diastatic power left in it, enough to give me a potential O.G. of 1.028. In comparison the 3 1/2 hour malt, (under the same brewing conditions and volume) would be 1.051.  I was scaling down to 500ml as a final volume and constantly switching from gallons to litres and back again so I’m sure the math went a little sideways. Since I’m just comparing the samples I figured it wasn’t too important as long as I mashed each 4 oz. sample the same way.

“Dad what are you making? it smells like chocolate!” – my 8 year old daughter while I was boiling a decoction from the 5 1/2 hour malt. And I would agree with her, it’s an awesome smell, much less smoke than last year perhaps due to the oak pellets. I think a beer made from one of these is going to be amazing.

These mashes were very long. They started at 152 degrees and after three hours the temperature usually dropped to about 135. I did a decoction every three hours to bring the heat back up to 152. I would use my refractometer to see what kind of progress I was making and I was really surprised to see the brix rise steadily with the darker malts even though they didn’t fully convert. Interestingly, nothing changed after the 8 hour mark for the 6 and 6 1/2 hour malt even though I mashed them for 10 hours.

HEALTH WARNING : I have to point this out because it’s a little worrisome. The 5 1/2, 6, and 6 1/2 hour malts look rather sooty. They’re grayish in colour and when I handled them the soot seemed to be coming off on my hands. I could be making something highly carcinogenic. This could be because one of the gassifiers went out and smouldered a while or it could be that my offset smoker system is just too small and as the flames hit the top of the firebox soot accumulated on the grain. Since my latest results are showing that I don’t have to be as careful with the temperature as I thought I might make a better system with the flames directly under the malt. Perhaps in an metal drum or something similar. Because of this sootiness I would not recommend using an offset smoker, I don’t want to be responsible for anybody getting cancer!Screen shot 2014-11-10 at 8.07.33 PM


Note: The Pale malt is from a different batch of malt but I included it to compare conversion times. Probably could have gotten a better SG had I adjusted the pH properly. Also I did not include the 3 hr malt as I thought it was unnecessary.


4 Comments

Posted by on November 11, 2014 in Diastatic Brown Malt


2014 Competition Results


Tags: , , , ,

Pre-industrial pale ale? tasting

DSCN9068_edited-1Well it was supposed to be a porter but… maybe next time. O.G. 1.051 F.G. 1.013  Alcohol 5.03 % Final volume 3.75 but I can’t be exact because of the spill. Efficiency according to Brew Tools is 78%. That’s the technical analysis, as far as flavour goes- Wow, this is an awesome beer, I’ve never had anything remotely similar. It’s only flaw (besides not being darker, of course) would be that it could use more hops but this is a matter of opinion as this is my wife Lori’s favourite beer. She’s not a huge beer fan, most of the time when she tries a new brew she responds with “tastes like beer” but this has such a unique flavour it took us a while to pin it down.

Clarity: Super clear but the colour is light, similar to a brown or even a pale ale. I know porters made with 100% diastatic brown malt were supposed to be lighter in colour but probably not this light. It might be more appropriate to call this a pre-industrial pale ale instead. I think it is worth some further experimentation to find out how dark I can go and how hot I can cure the malt without killing the enzymes. Perhaps I’ll make a chart that will include temperatures, kiln duration and extract potential.

Aroma: Certain smells can trigger memories and this beer had us both feeling particularly nostalgic. What came to my mind was the smell of charred cedar burnt in a campfire on a beach here on the west coast, it made me think of all the times we’ve spent camping by the ocean. What came to Lori’s mind was the smell of the Drum tobacco I used to smoke 20 years ago when we first met, (but in a good way).  I find that all smokey smells affect some primitive part of my brain, perhaps a part we share with bees who become docile when they come into contact with smoke. Or maybe they get nostalgic too.

Flavour: Some sweetness, a  low hop presence which I think is a shame because the pecan smoke flavour would go very well with a lot of hops.  I’ll try brewing a pecan smoked IPA very soon. There is a subtle nuttiness and tartness which is part of the smoke flavour and there’s a hint of toasted grains. The smoke is mellow enough, to allow the sweet and toasty flavours to come through.

This was a fun project but I’ve only scratched the surface, there will be many more attempts in the near future and I have much more research to do. Thanks to this beer I may be hooked on smoked malts. I’d like to try cherry, maple and oak as well.

 
12 Comments

Posted by on January 16, 2014 in Diastatic Brown Malt, The beers


Tags: , , , , , , ,

Historical Porter Brewday

The recipe: just 7 lbs of the diastatic brown malt, I combined both batches, Fuggle and Brewers Gold (both homegrown hops) and Wyeast London Ale III yeast. I mistakenly thought I could get away with a single step mash although this wasn’t the original plan. A protein rest would have helped for sure. Surprisingly my pH was 5.24 without any water additions. I kept my mash temp. high (156F) for sweetness since I wasn’t adding any caramel malts to this beer. Conversion took 4 1/2 hours. Original gravity was 1.051. Final volume – 3.75 gallons, but I had a disastrous spill while transferring from brew pot to carboy. I must have lost 2 pints, luckily the kids were outside and didn’t hear all the swearing. The final colour was very much like a darker brown ale.

There was quite a difference in aroma between the two batches of malt, the first being quite smoky like bacon, the second very toasty with hardly any smoke. The colour of the first batch of malt when ground was, as expected, almost white, whereas the second was reddish brown. Who knows perhaps I made what would have been called an Amber malt, but  I suspect if I had made the malt darker it may not have converted at all. If I do this again I think I would make a small batch of very dark roasted malt and combine it with a lighter version.

First batch on the left, second on the right.

First batch on the left, second on the right.

DSCN8973

 
Leave a comment

Posted by on December 24, 2013 in Diastatic Brown Malt, The beers


Tags: , , , , , , , , ,

Diastatic Brown #2

DSCN8924 DSCN8921

Brown malt on the left air-dried on the right.

Brown malt on the left air-dried on the right.

So with this batch there were a few things I did differently. Firstly, I air dried the green malt for 2 and a half days instead of just overnight. One thing I didn’t mention in the video was that I had a fan on it – yes I know that’s cheating, but my whole process isn’t exactly historically accurate anyway. That being said I don’t think it detracts from the overall goal of making a malt that would taste similar to a real diastatic brown malt. I think my malt would have dried without the fan but I was worried about mould, so I didn’t want to take any chances. I was quite surprised with how quickly it dried. After two and a half days it was just over 4 lbs (my original staring weight was 4 lbs) This drastically reduced the amount of time in the kiln. I kilned it at around 45C for 3 hours and at this point when I bit into the grains they had a very dry crunch to them so I knew they were dry enough (less than 10% moisture) to handle the increase in temperature without destroying the enzymes.

For this batch instead of charcoal and wood I just added another wood gas stove with the pecan pellets. This produced more heat and much less smoke. The final product still has a very subtle smoke aroma, but it is much more subtle than the first batch. At one point the temperature got a little too high but I think it was only around the fire box.  In the video I state that the interior of the grains are a tan colour, however upon further investigation I’ve noticed that there are more white interiors than the tan ones.


Leave a comment

Posted by on December 1, 2013 in Diastatic Brown Malt


Tags: , , , , , , , , ,

Diastatic Brown Malt

As requested, thanks Andrew! diastatic brown malt, definitely the most interesting and most challenging malt to make. I experimented a lot with this one. My first challenge was to find out what it was. The easy definition: A dark malt that has been dried over burning wood or straw but still has diastatic power to convert itself. It predates the widespread use  of coke in malt kilns and predates the use of thermometers. Coke was used to dry malt as early as 1642 but was made more widely available when the means of coke production became more efficient in the later half of the 18th Century. So how did they determine the size of the fire and how dark it could be without destroying the enzymes in the barley? I did come across a few clues in the London and Country Brewer published in 1736 which in describing the production of malt states ” it then must be put on the Kiln to dry four, six or twelve Hours, according to the nature of the Malt, for the pale sort requires more leisure and less fire than the amber or brown sorts” This means that the Pale malt would be dried with a low fire for 12 and the brown malt with a hot fire for 4 hours.

There is another very informative passage about the types of screens used in malt kilns of that era, “There are several methods used in drying of Malts, as the Iron Plate-frame, the Tyle-frame, that are both full of little Holes: The Brass-wyred and Iron-wyred Frame, and the Hair-cloth; the Iron and Tyled one, were chiefly Invented for drying of brown Malts and saving of Fuel, for these when they come to be thorough hot will make the Corns crack and jump by the fierceness of their heat, so that they will be roasted or scorch’d in a little time, and after they are off the Kiln, to plump the body of the Corn and make it take the Eye, some will sprinkle water over it that it may meet with the better Market. But if such Malt is not used quickly, it will slacken and lose its Spirits to a great degree, and perhaps in half a Year or less may be taken by the Whools and spoiled: Such hasty dryings or scorchings are also apt to bitter the Malt by burning its skin, and therefore these Kilns are not so much used now as formerly: The Wyre-frames indeed are something better, yet they are apt to scorch the outward part of the Corn, that cannot be got off so soon as the Hair-cloth admits of, for these must be swept, when the other is only turned at once; however these last three ways are now in much request for drying pale and amber Malts, because their fire may be kept with more leisure, and the Malt more gradually and truer dyed, but by many the Hair-cloth is reckoned the best of all.”

The London and Country Brewer only refers to three types of malt produced at this time: Pale, Amber and Brown malt. These malts were also mixed with each other –

“At Bridport in Dorsetshire, I knew an Inn-keeper use half Pale and half Brown Malt for Brewing his Butt-beers, that, proved to my Palate the best I ever drank on the Road, which I think may be accounted for, in that the Pale being the slackest, and the Brown the hardest dryed, must produce a mellow good Drink by the help of a requisite Age, that will reduce those extreams to a proper Quality.”

There are some people who have researched this subject much more than I have – check out these blogs: The Perfect Pint and Shut Up About Barclay Perkins.

The second challenge: How the hell do I dry malt over fire! I live in a town house, our backyard is a common area shared by our neighbours so I couldn’t build anything or have a fire pit like the fellow did in The Perfect Pint but I found an answer thanks to countless hours of watching outdoor survival videos on Youtube. I could burn stuff in a camp stove and then contain that fire within a smoker so I could have some control over the heat. Initially I had planned to use straw pellets but at $15 per 2 pounds these are a burn. So I went with the wood pellets. Keep in mind that this is my first attempt at this malt so it turned out rather light, I didn’t want to go too dark and kill the enzymes. My next batch will be darker though as I plan to cure it at a higher temperature by using either more gas wood stoves or by burning chunks of maple wood. If you’re interested in making this malt there are some very informative threads on Jim’s Beer Kit page by Ben a.k.a. Fuggledog

 
8 Comments

Posted by on November 15, 2013 in Diastatic Brown Malt


Tags: , , , , ,

 
Imbuepalate.com

To Inspire and Permeate through Chefs, My Kitchen, and Adventures in Food, Drink and Exploration.

Threefrenchs: A Fermented Exploration

Booze, Travel & Food (and maybe a few surprises)

The Meandering Meadery

Cultivating fermented food and drinks one jar at a time

Brülosophy

They Who Drink Beer Will Think Beer

Untitled RSS Feed

Growing, malting and brewing beer

Creative Brewing

by Scott Ickes

A Brewer's Wife

Law librarian, brewer's wife and mom of three girls (not necessarily in that order)

From Plants to Beer

The real route of beer

My Own Home Brew

My record and experience in brewing

Romping & Nguyening

Romping around the world and Nguyening since March 2014.

Brewing Beer The Hard Way

Growing, malting and brewing beer

Five Blades Brewing

F' Everything, We're Doing Five Blades

The ATL Beer Guy

This Guy Knows Beer -- Also visit www.pouranotherpint.com

East Happyland Homebrew Garden Louisiana

Gardening hops, grains, vegetables, and brewing beer in South Louisiana. And they said it couldn't be done....

The Apartment Homebrewer

Brewing small batches of craft beer in a 650 sqft apartment

Bishop's Beer Blog

Just another WordPress.com site

The Quest for Edelstoff

Making Liquid Bread

Home Bruin

The homebrewing adventures of a Boston sports fan